LED Cornhole Boards
LED-Lit Cornhole Boards with Arduino Control
Want cornhole boards that light up and react to gameplay? These custom LED boards combine woodworking, epoxy work, and Arduino electronics for an eye-catching game experience.
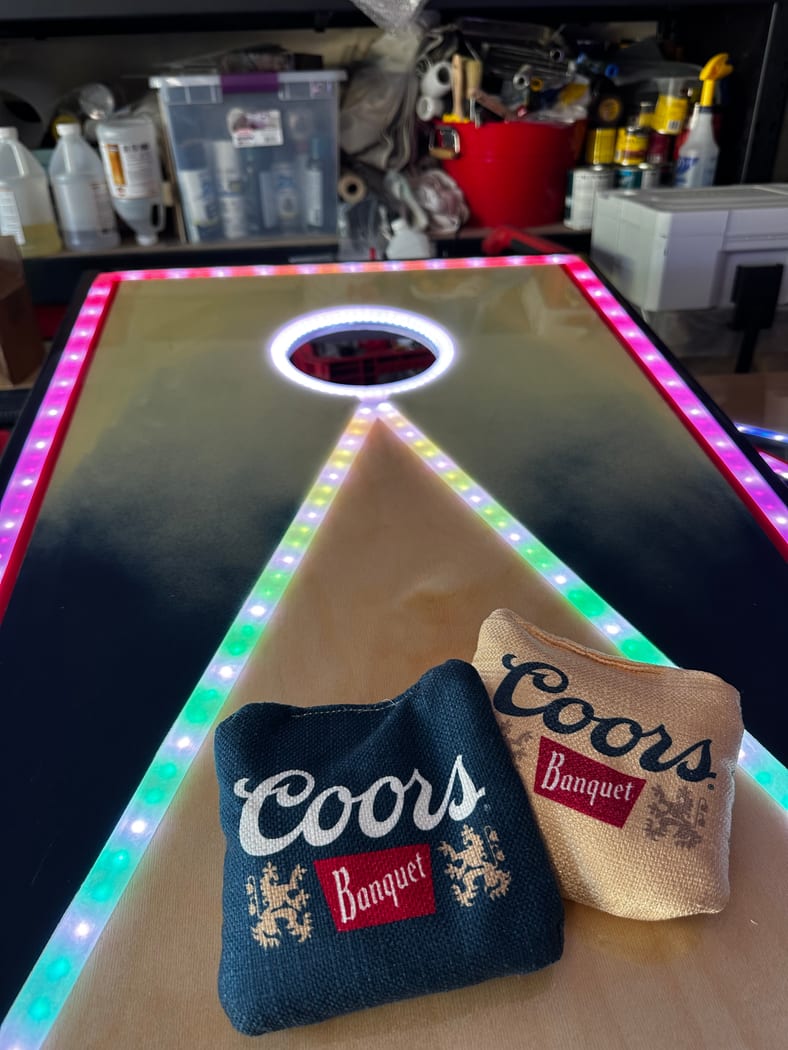
Inspired by a YouTube build and the Coors Banquet aesthetic from Slick Woody's bags, these boards feature reactive LED strips that respond to impacts and scoring. When a bag hits the board, a strength meter fills the ring based on impact force. Score through the hole and get a sparkle celebration with flashing green lights.
The build challenged my epoxy and painting skills (painting is definitely not my favorite part), but using AI to plan electronics and troubleshoot Arduino code saved months of learning from scratch.
What You'll Build
Interactive cornhole boards featuring:
- 60 addressable RGB LEDs around the hole
- 116 LEDs per side creating reactive light patterns
- Vibration sensor detecting impact strength
- IR break beam detecting scoring
- Rechargeable battery system for portable play
- Multiple light patterns switchable via button
- Arduino-controlled animations and effects
Build time: 40+ hours per board (woodworking, epoxy, electronics)
Cost: ~$300-400 per board in materials
Difficulty: Advanced (requires woodworking, epoxy experience, and basic electronics/soldering)
How It Works
Idle Mode: Side lights display selected pattern, ring glows white
Impact Detection: Vibration sensor triggers strength meter on ring LEDs based on hit intensity
Scoring: IR break beam detects bag going through hole, triggers sparkle pattern on sides and green flash on ring
Pattern Control: Momentary button cycles through rainbow color patterns
Full Arduino code available on GitHub
Board Construction
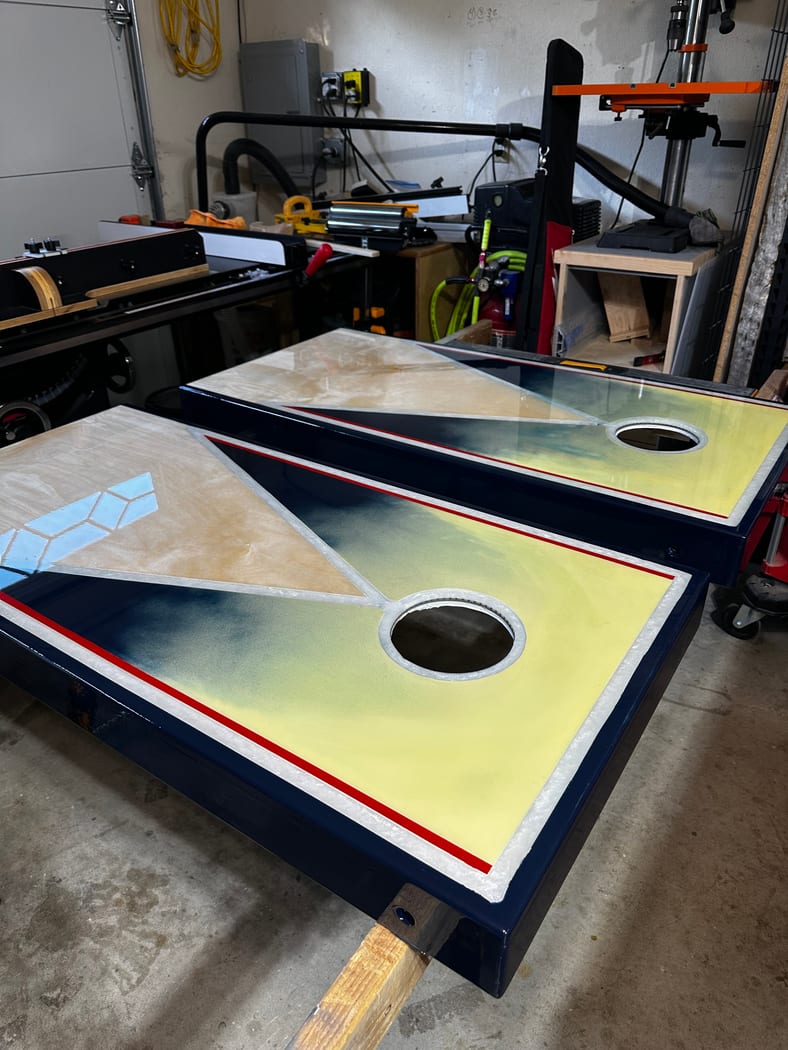
Built from Baltic birch plywood for a quality flat surface with poplar sides for economical hardwood construction.
Step-by-Step Build Process
- Base construction - Cut and assemble boards from Baltic birch (top) and poplar (frame)
- LED channels - Cut 6" hole and router channels for LED strips
- Masking and painting - Paint white base coat on all non-wood areas (most tedious step!)
- LED installation - Mount strips using adhesive, test extensively
- Sealing - Seal wire holes and 6" opening edge with HDPE and silicone
- First epoxy pour - Clear table top epoxy in LED channels only (level with LED height)
- Second pour - Pearl white mica powder mixed with epoxy as LED diffuser (slight overpour better than underpour)
- Sanding - Remove escaped epoxy from channel edges
- Electronics test - Confirm all LEDs working before proceeding (perform surgery if needed - I had to!)
- Final painting - Apply Coors Banquet design, let cure several days
- Clear coat - Final clear epoxy over entire board surface, letting it drip off edges
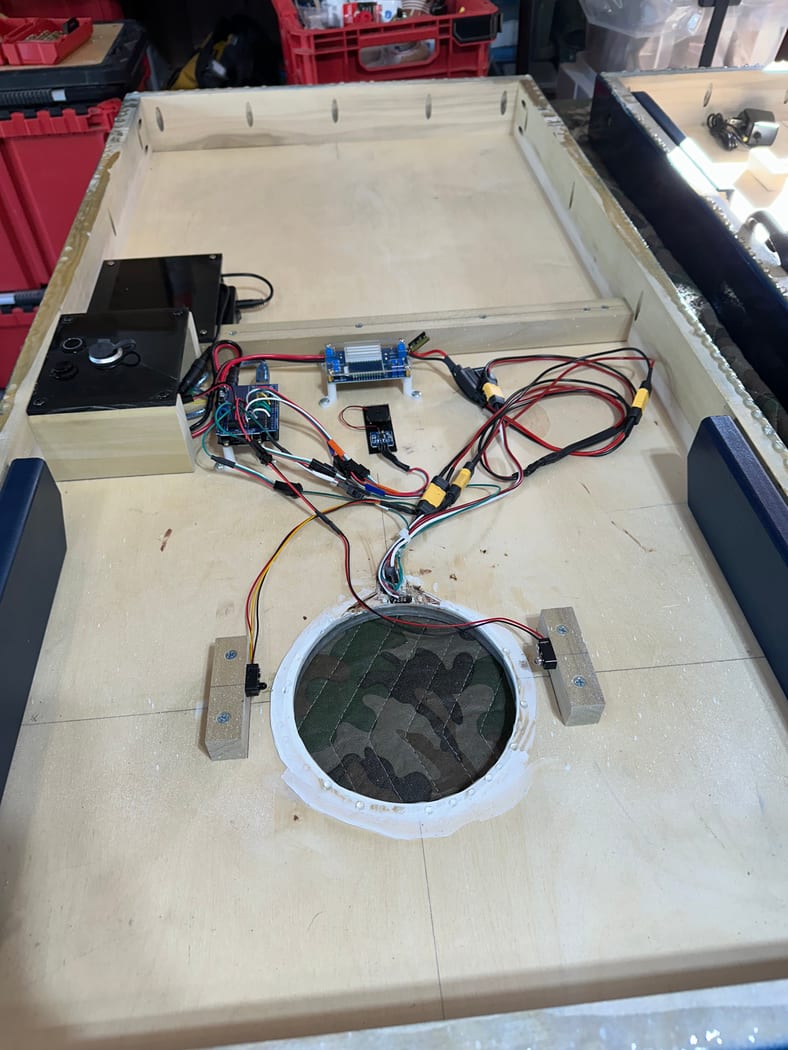
- Electronics assembly - Mount all components to board back, wire and test
Lessons Learned
What I'd do differently:
- Pull LED wires completely through holes to avoid silicone mess around wire bundles
- Use separate holes for different LED strips (smaller holes are easier to seal)
- Remove extraneous wires from LED ring before installation and ensure any exposed connections are well secured
- Make all wires longer than you think you need
- Ensure button platform sits below board edge height
- Leaks are a pain to fix so be ready with everything you might need
The Evil Twin: Like all woodworking projects, one board went smoothly, the other required cornhole board surgery to fix LED connections that failed after epoxy pours.
Electronics Components
Main Components

Arduino Nano with Headers
The brains of the operation. Controls all LEDs, reads sensors, manages patterns.

Adjustable Buck Converter / Step Down Voltage Regulator with Display
Steps down 12V battery to 5V for LEDs. Adjustable output with built-in voltage display for monitoring.

Programmable LED Ring (60 LEDs)
WS2812B addressable RGB ring for the hole - creates strength meter and scoring effects.
LED Strips & Sensors
- Programmable LED Strips (WS2812B) - 116 LEDs per side (42+58+16 pattern)
- Vibration Sensor Module - Detects bag impacts with adjustable sensitivity
- IR Break Beam Sensor - Detects scoring through hole
- 12V 6000mAh Rechargeable Battery Pack - Powers entire system, includes USB output
- Arduino Nano Breakout Board - Simplifies connections without soldering
Switches / Connectors / Wire
- Illuminated Power Switch - Main power control with LED indicator
- Momentary Push Button - Pattern selection control
- USB Pass-Through Connector - Access to battery USB port
- 3 Pin JST Connectors - LED data connections
- 2 Pin JST Connectors - Power connections
- 5.5x2.1mm Barrel Connectors - Arduino power input
- Bullet Connectors - High-current LED power lines
- 15A Inline Fuse Holder - Circuit protection
- Dupont 3 Pin Female Connectors - Breakout board connections
- Dupont 2 Pin Female Connectors - Breakout board connections
- 22 AWG LED Cable - Data line wiring
- 330 Ohm Resistors - Data line protection
- 1000µF Capacitors - Power smoothing across buck converter
- 14 AWG Power Cable - Main power distribution
Wiring Diagram
Power Distribution:
- Battery (12.6V) → Power switch → Buck converter (set to 5V 9A max)
- Buck converter → 15A fuse → LED strips (via XT60 connectors)
- Battery → Barrel connector → Arduino Nano (direct 12V, regulated onboard)
- 1000µF capacitor across buck converter output
Data Connections:
- Arduino Pin 5 → Ring LEDs (via 330Ω resistor)
- Arduino Pin 6 → Side LED Strip 1 (via 330Ω resistor)
- Arduino Pin 7 → Side LED Strip 2 (via 330Ω resistor)
- Arduino Pin 3 → IR Break Beam (hardware interrupt capable)
- Arduino A1 → Vibration Sensor (analog input)
- Arduino Pin 2 → Pattern Button
LED Strip Layout Per Side:
- 42 LEDs: Ring to bottom corners
- 58 LEDs: Bottom corners to top
- 16 LEDs: Across top
- Total: 116 LEDs per side + 60 LED ring = 236 addressable LEDs per board
Code & Programming
Full Arduino sketch available on GitHub
Key features:
- FastLED library for smooth animations
- Hardware interrupts for responsive scoring detection
- Adjustable sensitivity for impact strength meter
- Multiple color patterns with button cycling
- Power-efficient idle modes
Note: Originally used Arduino Uno but upgraded to Nano Every for additional RAM needed by complex animations.
Materials & Paint
Wood:
- Baltic birch plywood (top surface)
- Poplar lumber (frame)
Finish:
- White base coat
- Coors Banquet-inspired design matching Slick Woody's bags
- Clear table top epoxy (thick pour for LED channels)
- Pearl white mica powder (epoxy diffuser)
- Final clear coat epoxy
Tips for Success
Electronics:
- Test every connection before sealing with epoxy
- Use heat shrink on all solder joints
- Label all wires before assembly
- Keep spare LEDs and connectors for repairs
Epoxy Work:
- Level boards perfectly - use shims and spirit level
- Slightly overpour rather than underpour
- Mix epoxy thoroughly - unmixed spots won't cure
- Work in warm environment (70-75°F ideal)
- Have repair plan ready (I needed mine!)
AI-Assisted Development:
- Used AI to plan electronics layout and power requirements
- AI helped troubleshoot Arduino code and optimize animations
- Saved months of trial-and-error learning
- Still needed to understand fundamentals for debugging
The Result
These boards are the ultimate conversation starter at gatherings. The reactive lights add a whole new dimension to cornhole - kids and adults alike love seeing the strength meter and celebration animations.
Was it worth 40+ hours per board? Absolutely. Would I build them again? Maybe... after I forget how tedious the painting was!
Want to Build Your Own?
Interested in detailed build plans, wiring diagrams, or a full video tutorial?
Let me know if you'd like to see:
- Complete cutting diagrams and woodworking plans
- Detailed wiring schematics with all connections
- Step-by-step epoxy pouring guide
- Video walkthrough of the build process
- Questions about the Arduino code or electronics
The full code is available on GitHub, but contact me if you need help troubleshooting or want to discuss modifications!
Paint Inspiration: The board paint design was inspired by the Coors Banquet cornhole bags from Slick Woody's - check them out for quality bags to match!